
|
| How to Enforce Custom Content Policies using Document AI in Power Automate |
| 1/22/2026 - Brian O'Neill |
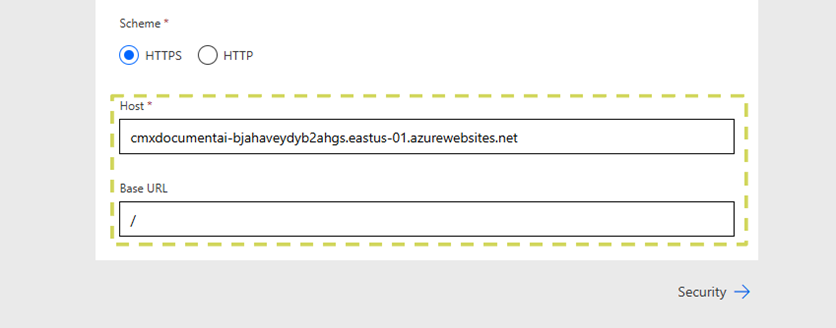
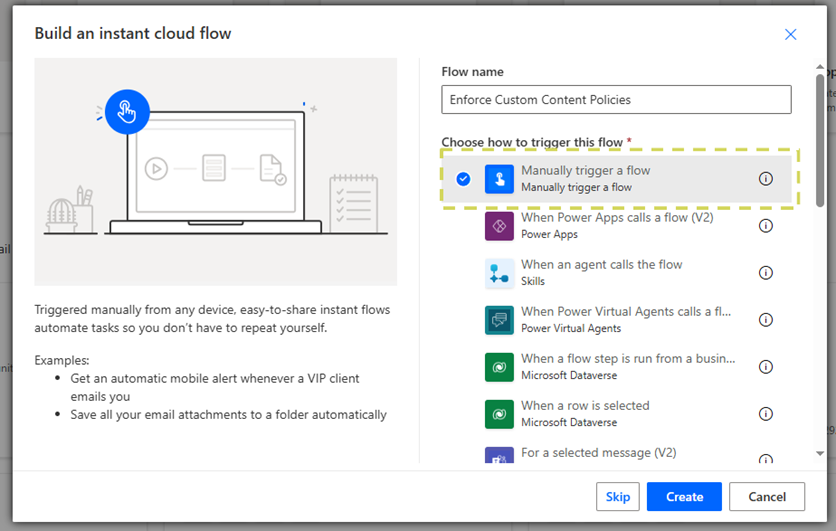
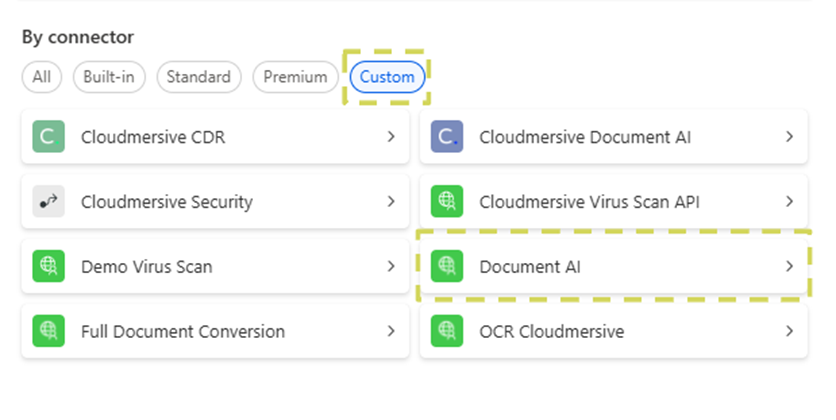
Cloudmersive Document AI is here, and it’s ready to revolutionize your document processing workflows. Document AI empowers enterprises to intelligently summarize or categorize document contents, retrieve form responses, pull data from tables, and extract fields of data from invoices, receipts, tax forms, and other standard documents. Cloudmersive Document AI Content Policly EnforcementThe Document AI API is brand new and ready to be imported to Power Automate as a Custom Connector. From there, Document AI actions – including custom content policy enforcement – can be implemented into new and existing document processing workflows with ease. In this article, we’ll walk through an example Power Automate flow which takes advantage of the Document AI API’s content policy enforcement capabilities to determine whether a document should move forward in the flow (or divert to some different path). We’ll use an invoice document in our example flow to provide a realistic use-case. Uploading a Custom Document AI Connector to Power AutomateBefore we get started, we’ll first address that we’re uploading the Document AI API to Power Automate as a custom connector in this case. To upload any Cloudmersive API to Power Automate as a custom connector, we’ll need to 1) upload the API specification to the power platform via JSON file or OpenAPI URL and 2) set a host endpoint and base path in the General information tab of the custom connector editor. If we’re a Cloudmersive customer using a private or managed instance endpoint, we can use that endpoint as the host in our custom connector to take full advantage of our deployed infrastructure in Power Automate. Enforcing Custom Content Policies in a Power Automate FlowAfter we’ve successfully created our Document AI custom connector, we’ll begin building our custom content policy enforcement flow. To keep things as simple as possible in this walkthrough, we’ll build an example
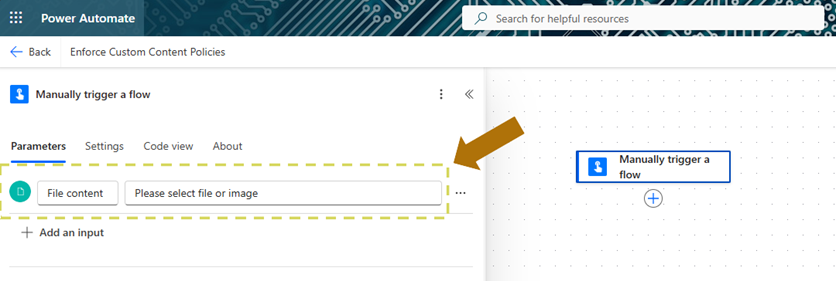
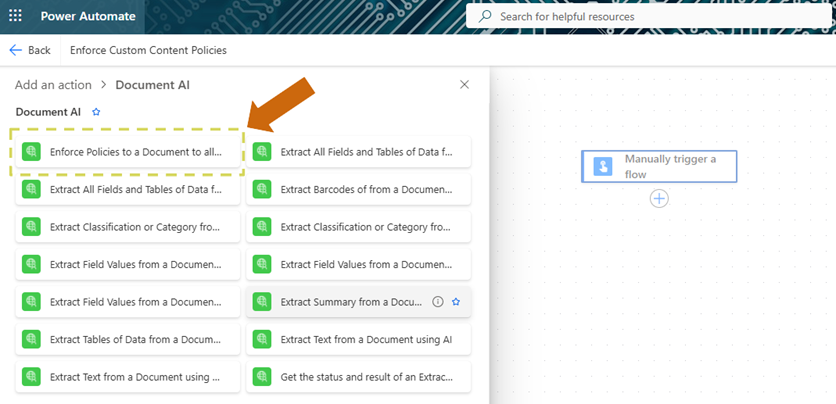
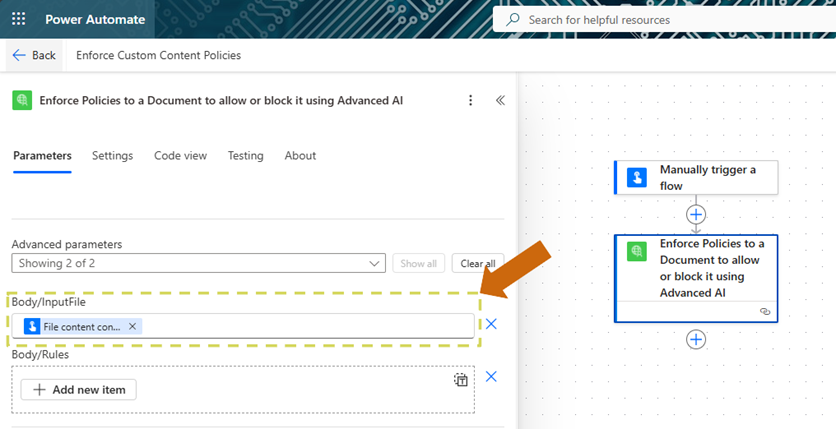
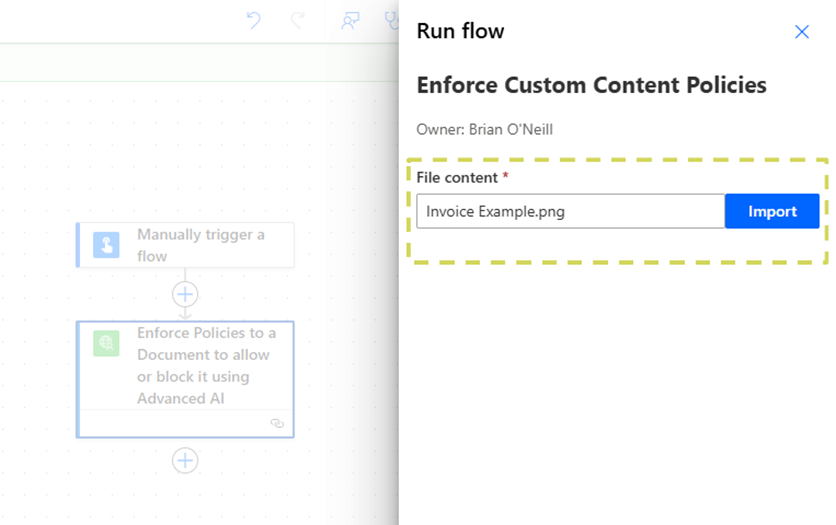
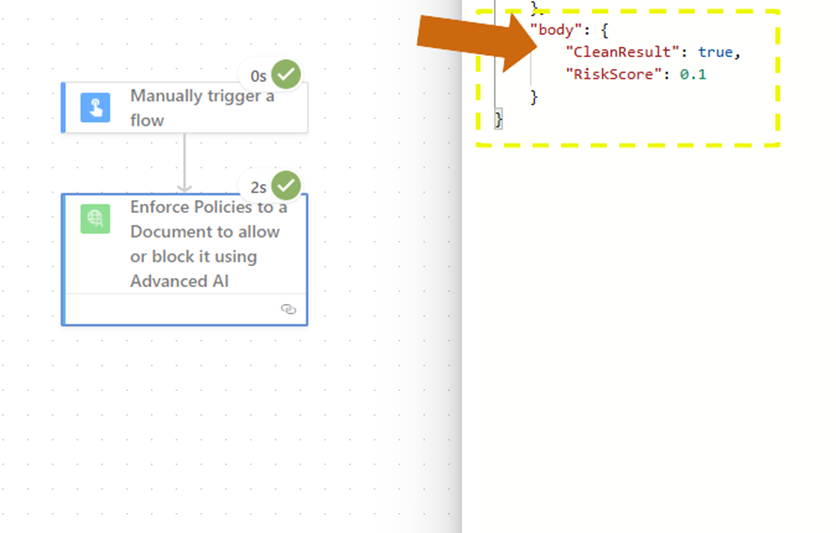
We’ll begin editing our flow by first selectin the Next, we’ll add a new action and navigate to the From the Document AI actions list, we’ll select the action titled We’ll next configure our To begin, we’ll first pass our dynamic file content placeholder into the We’ll then click To create a custom rule, we need to provide a In this example, we’ll create a policy that checks if an invoice contains a due date. We’ll set the This rule will allow invoices only if both an invoice number and invoice date are present. We’ll only create one rule for now, but it’s important to note that we can add as many rules as we want to the Now that we’ve successfully configured our rule, we’ll save our flow and run a test. Since we’ve elected to run our flow manually, we’ll pass in our example document at runtime. When our flow finishes running, we’ll navigate to the As we can see above, our document returned In the event our invoice did NOT contain the invoice number and date we wanted, we would receive a response like the below example: Implementing and enforcing a custom policy on this invoice document shows that we can easily control and validate content in our Power Automate flows on our own terms. We can only involve human intervention when documents violate some crucial aspect of our expectations. ConclusionIn this article, we learned how to easily enforce custom content policies on a (invoice) document using the Document AI Including Document AI in Power Automate instantly improves our ability to process and validate documents. With Document AI, we can easily prevent documents from moving forward in our workflows when they contain subtle violations of our self-determined policies. For expert advice on using the Cloudmersive Document AI API in Power Automate, please reach out to a Cloudmersive representative. |
Jetzt registrieren oder 

 Technische Artikel
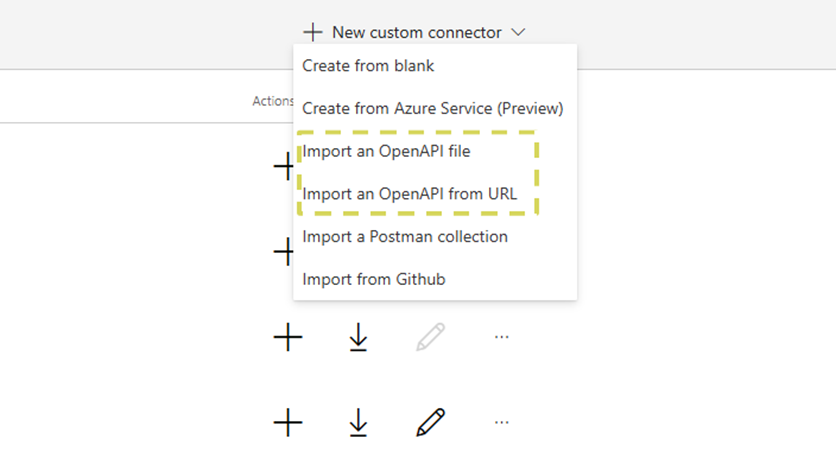


 Virenscan-APIs
 Content Disarm and Reconstruction APIs
 Spam-Erkennungs-APIs
 APIs für Dokumentenkonvertierung & -verarbeitung
 Document AI APIs
 Natural Language Processing (NLP) APIs
 Optical Character Recognition (OCR) APIs
 APIs für Bild- und Gesichtserkennung und -verarbeitung